> For the complete documentation index, see [llms.txt](https://docs.tresori.xyz/llms.txt). Markdown versions of documentation pages are available by appending `.md` to page URLs; this page is available as [Markdown](https://docs.tresori.xyz/gas-tank.md).
# Gas Tank
The **Gas Tank** is a core TreSori feature that enables **gasless transactions** by allowing applications to sponsor blockchain transaction fees on behalf of end users. Instead of requiring users to hold native tokens (ETH, BNB, etc.) for gas, transactions are funded from a centralized gas balance managed through the Gas Tank.
This capability significantly improves user onboarding and experience, especially for Web2-native users who are unfamiliar with blockchain mechanics.
The **Gas Tank** feature is enabled only when the user enables the “Gasless Transactions” configuration option during project creation and completes the gas fee configuration for that project.
For more, go to **Create Project >** **Step-5: Enable/ Disable Gasless transactions.**
### Gas Tank Management (USDT)
The Gas Tank operates using **USDT** as the funding currency, abstracting away network-specific gas tokens.
#### Supported Token Standards & Networks
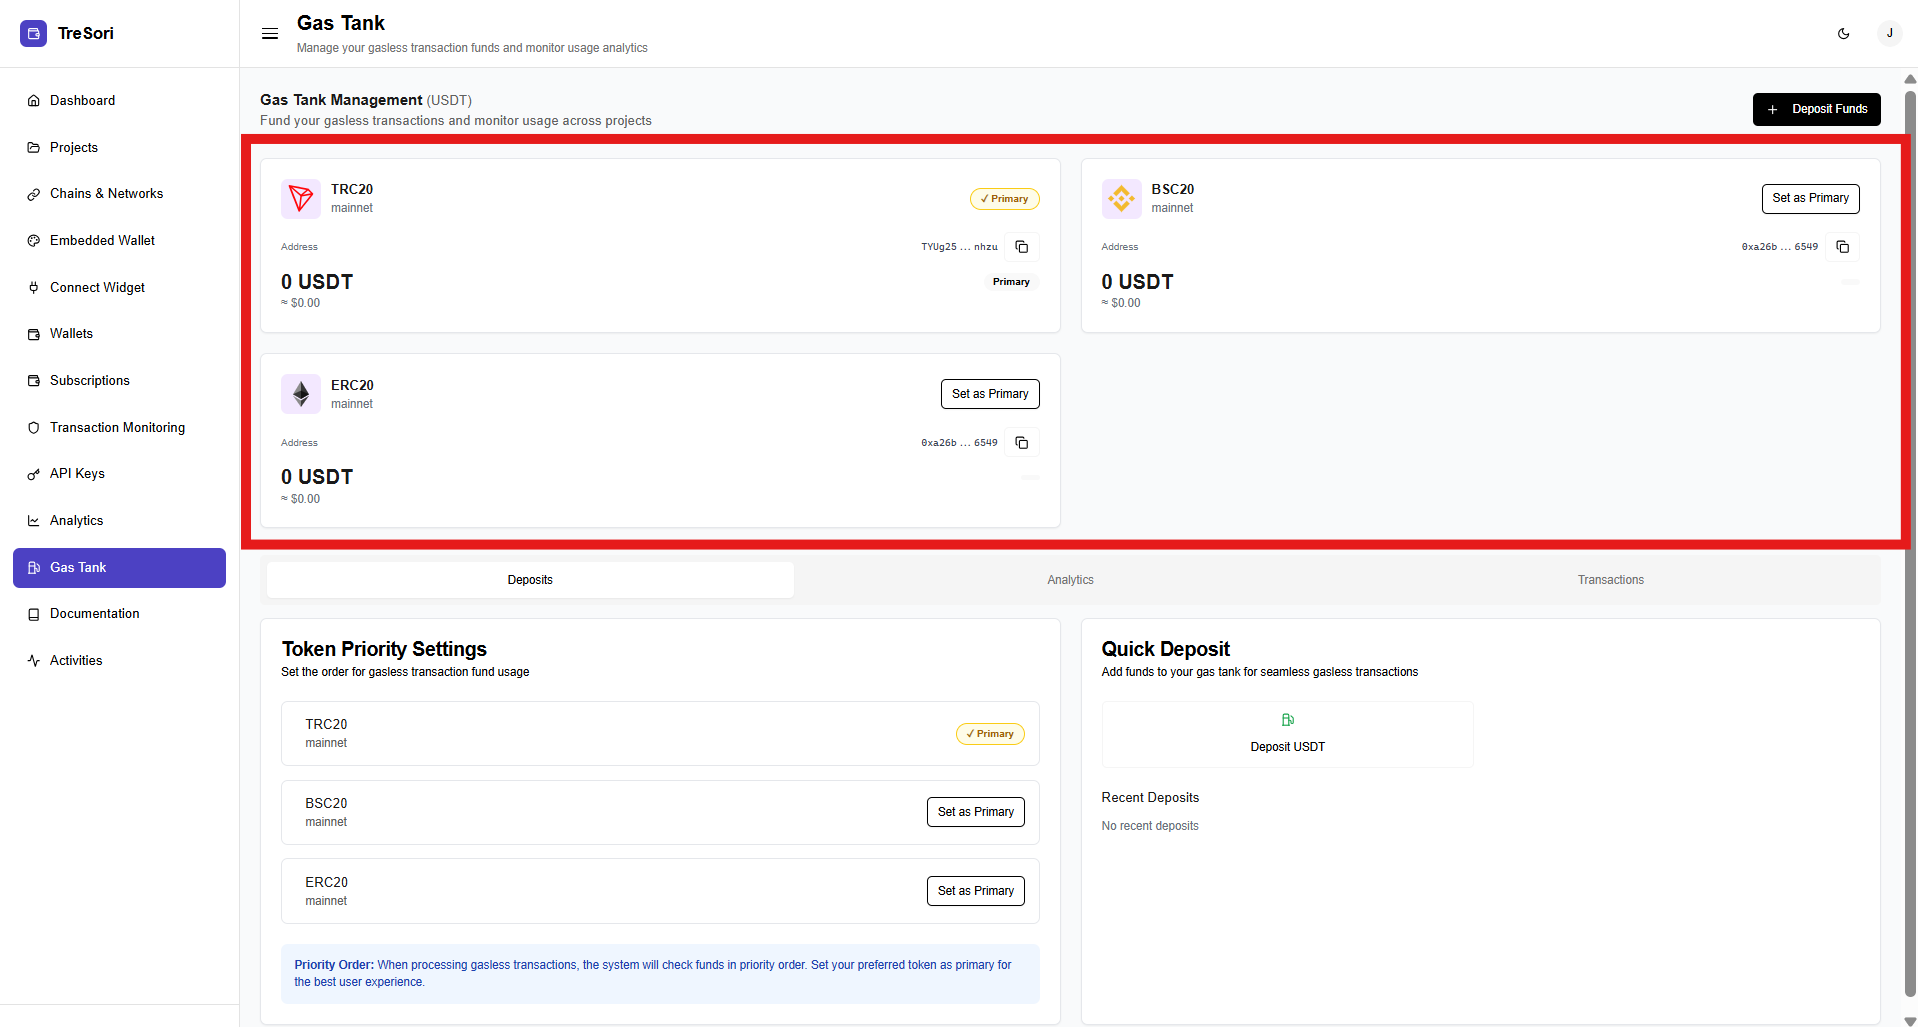
The Gas Tank supports multiple USDT standards on different mainnet blockchains, including:
* **TRC20 (Tron Mainnet)**
* **BSC20 (BNB Smart Chain Mainnet)**
* **ERC20 (Ethereum Mainnet)**
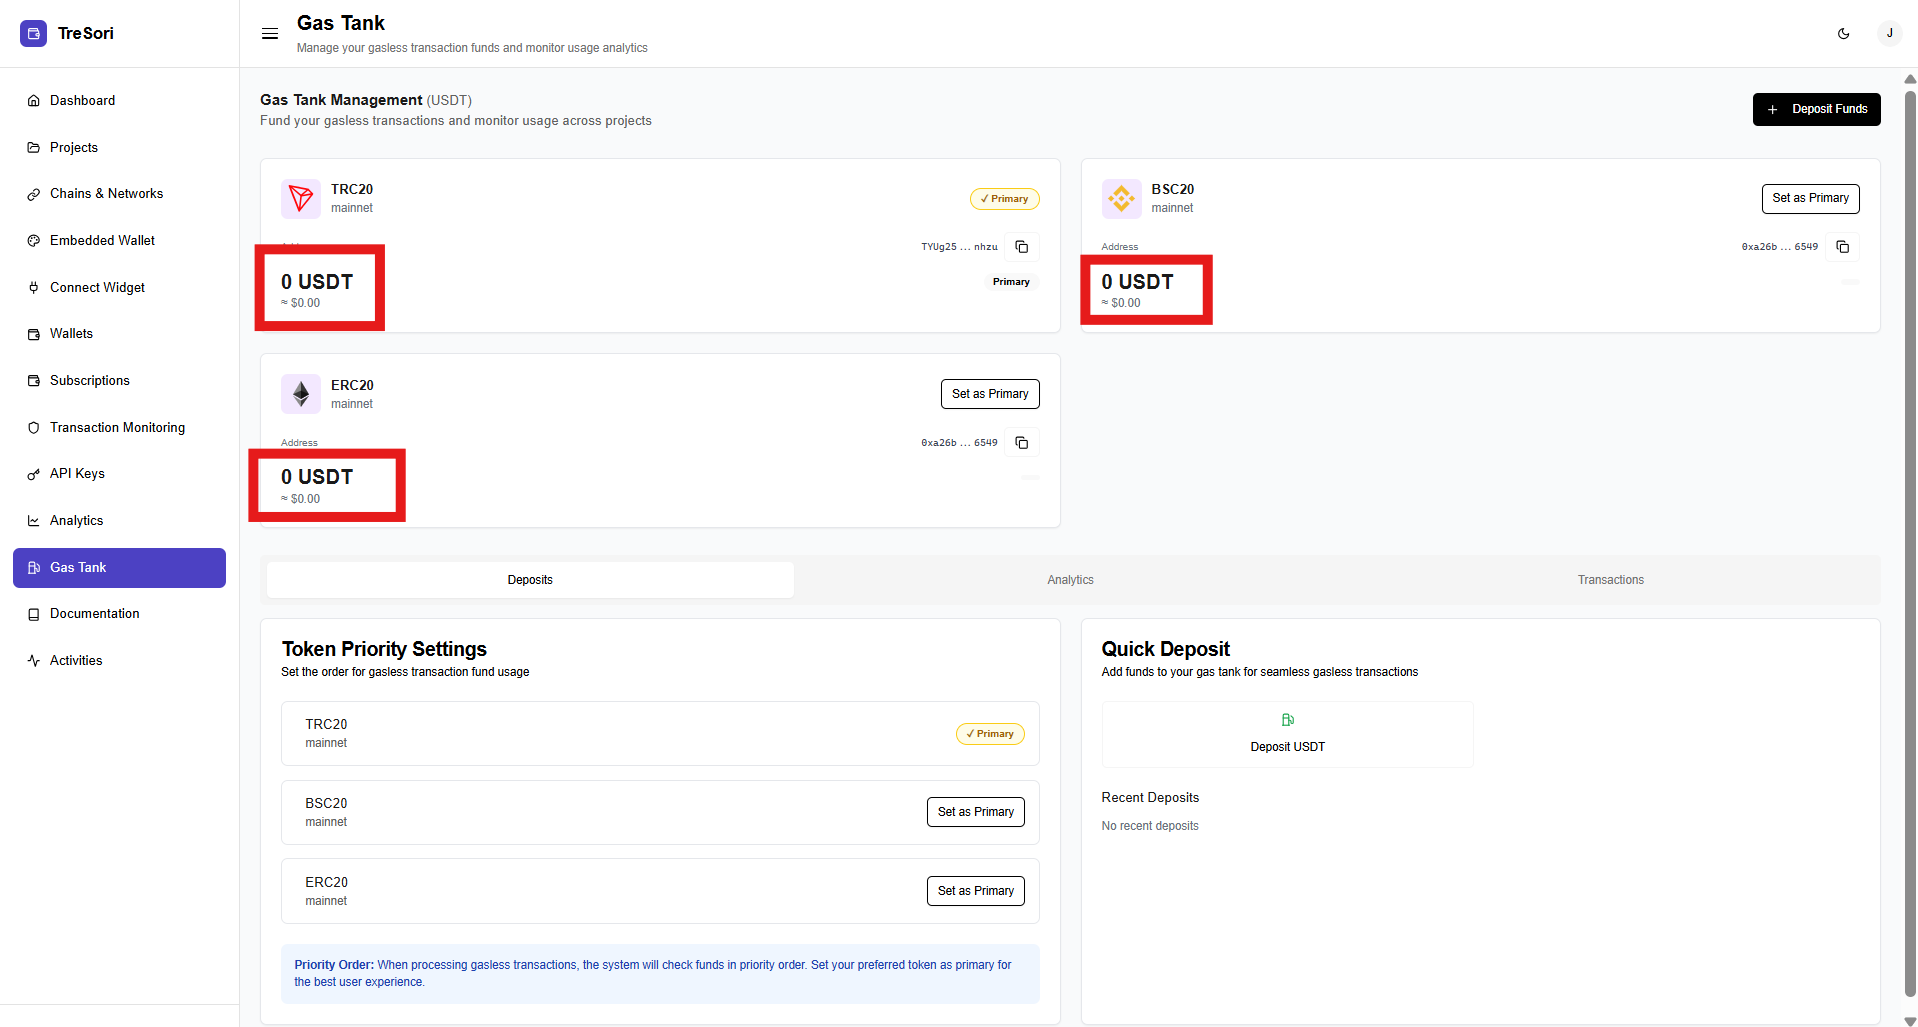
Each network displays:
* Wallet address for deposit
* Current USDT balance
* Approximate USD value
* Primary / non-primary status
Tresori follows a decentralized approach and does not rely on a single resource, enabling users to interact with blockchain networks and applications seamlessly, without dependency-related limitations or interruptions.
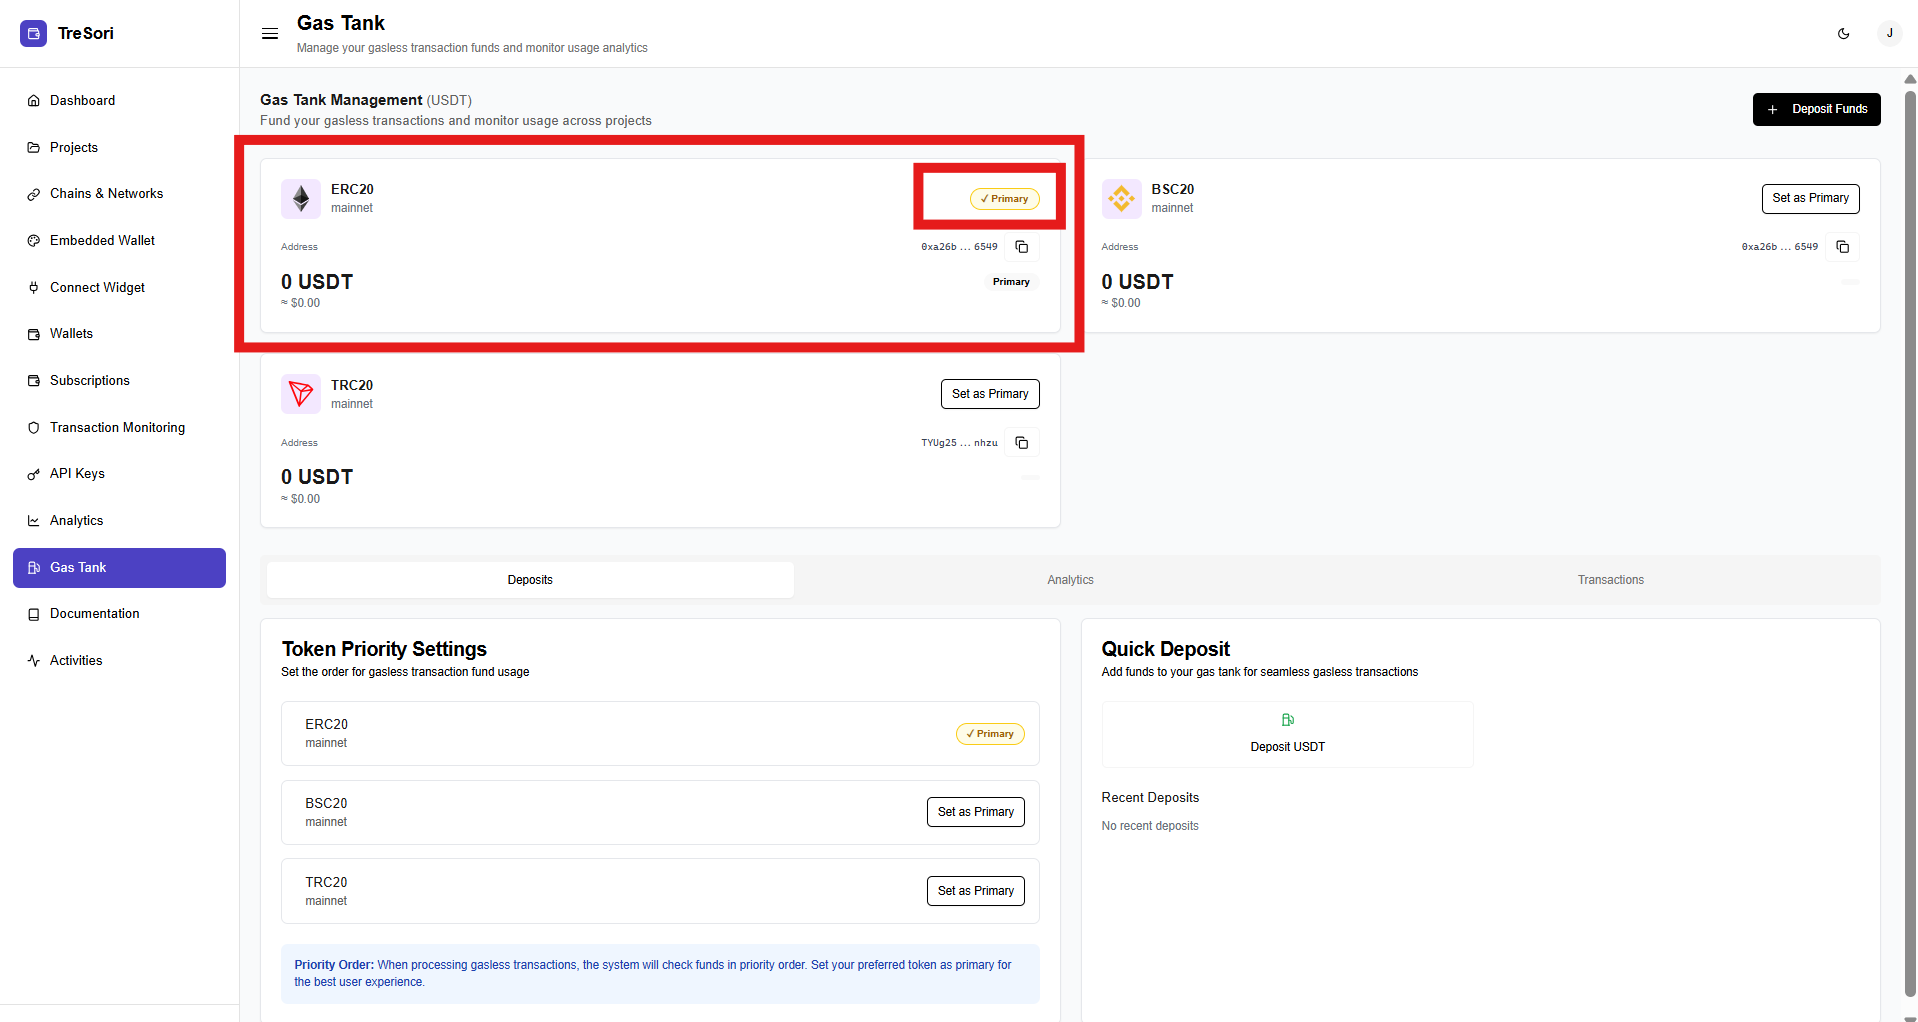
Users can set any Gas Tank wallet as the primary wallet responsible for sponsoring gas fees and supporting operational transactions for the project.
Click the **“Set Primary”** button displayed at the top of the selected Gas Tank wallet.
As soon as users click on it the system will set that wallet primary and change the position of the wallet tank as well.
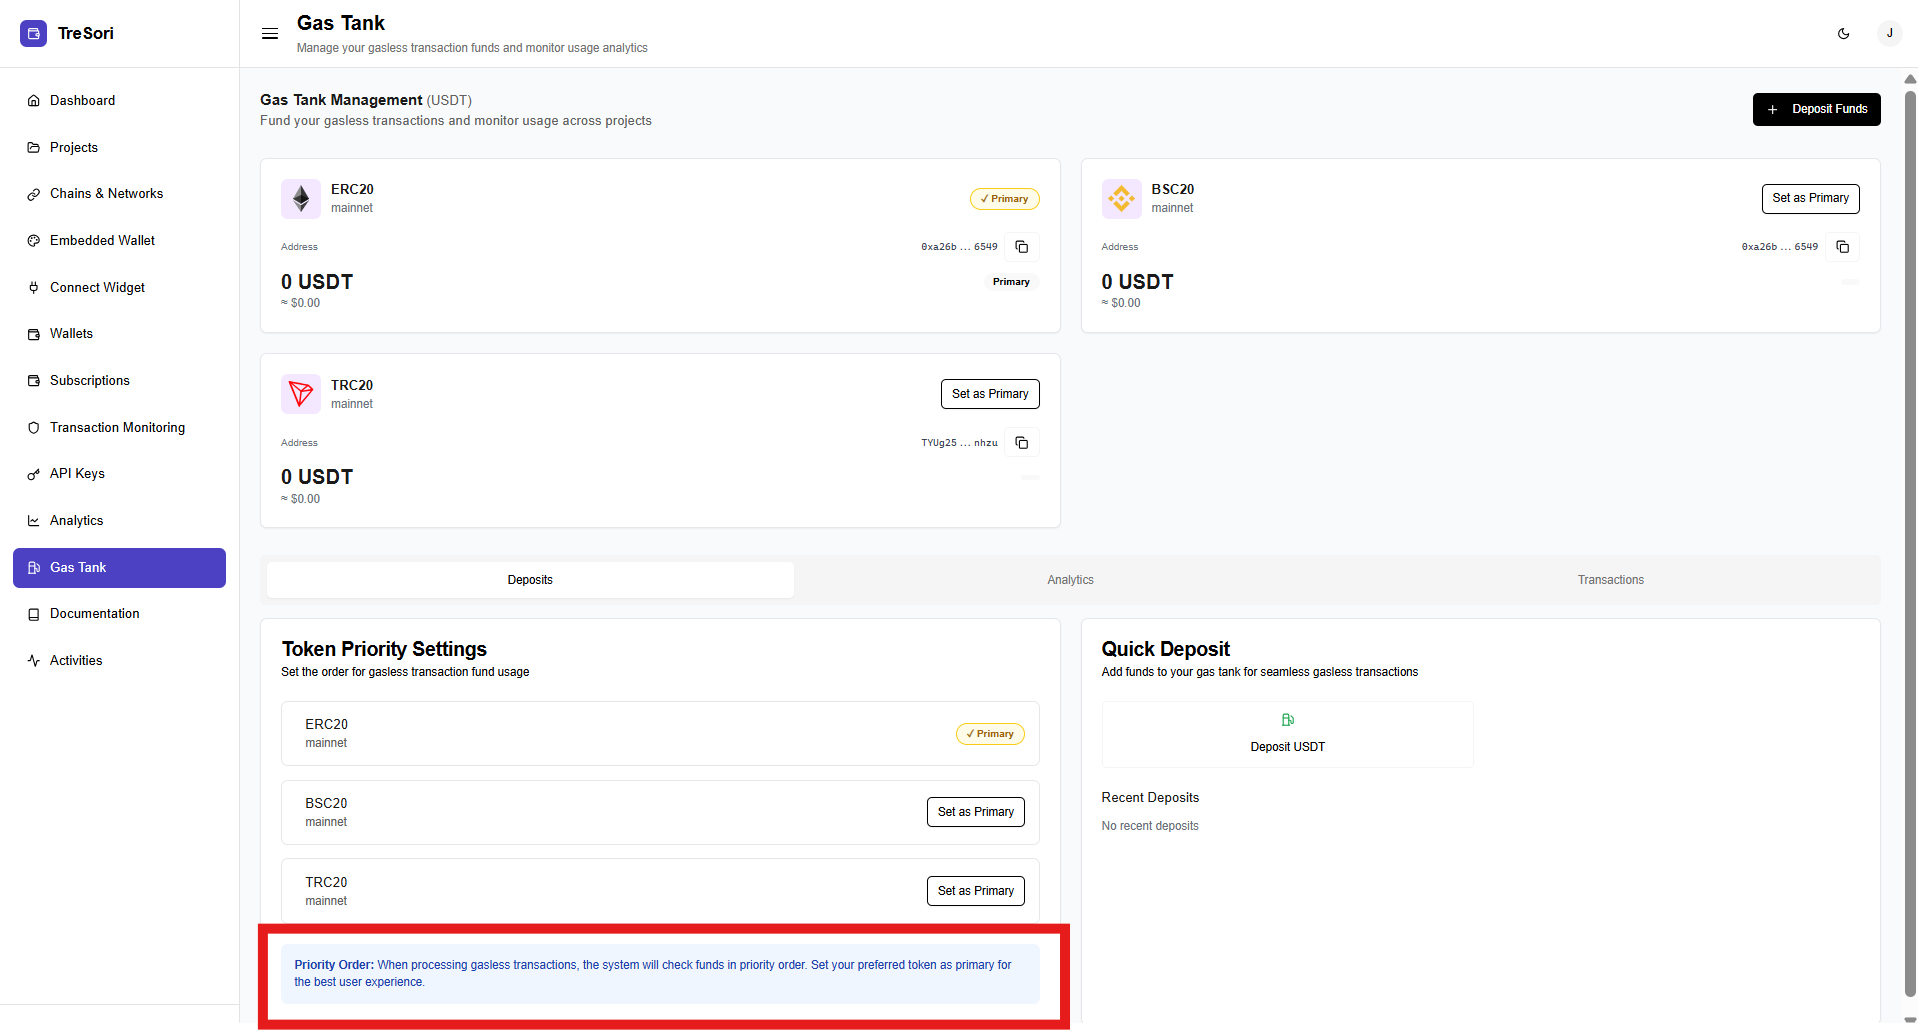
#### Token Priority Settings
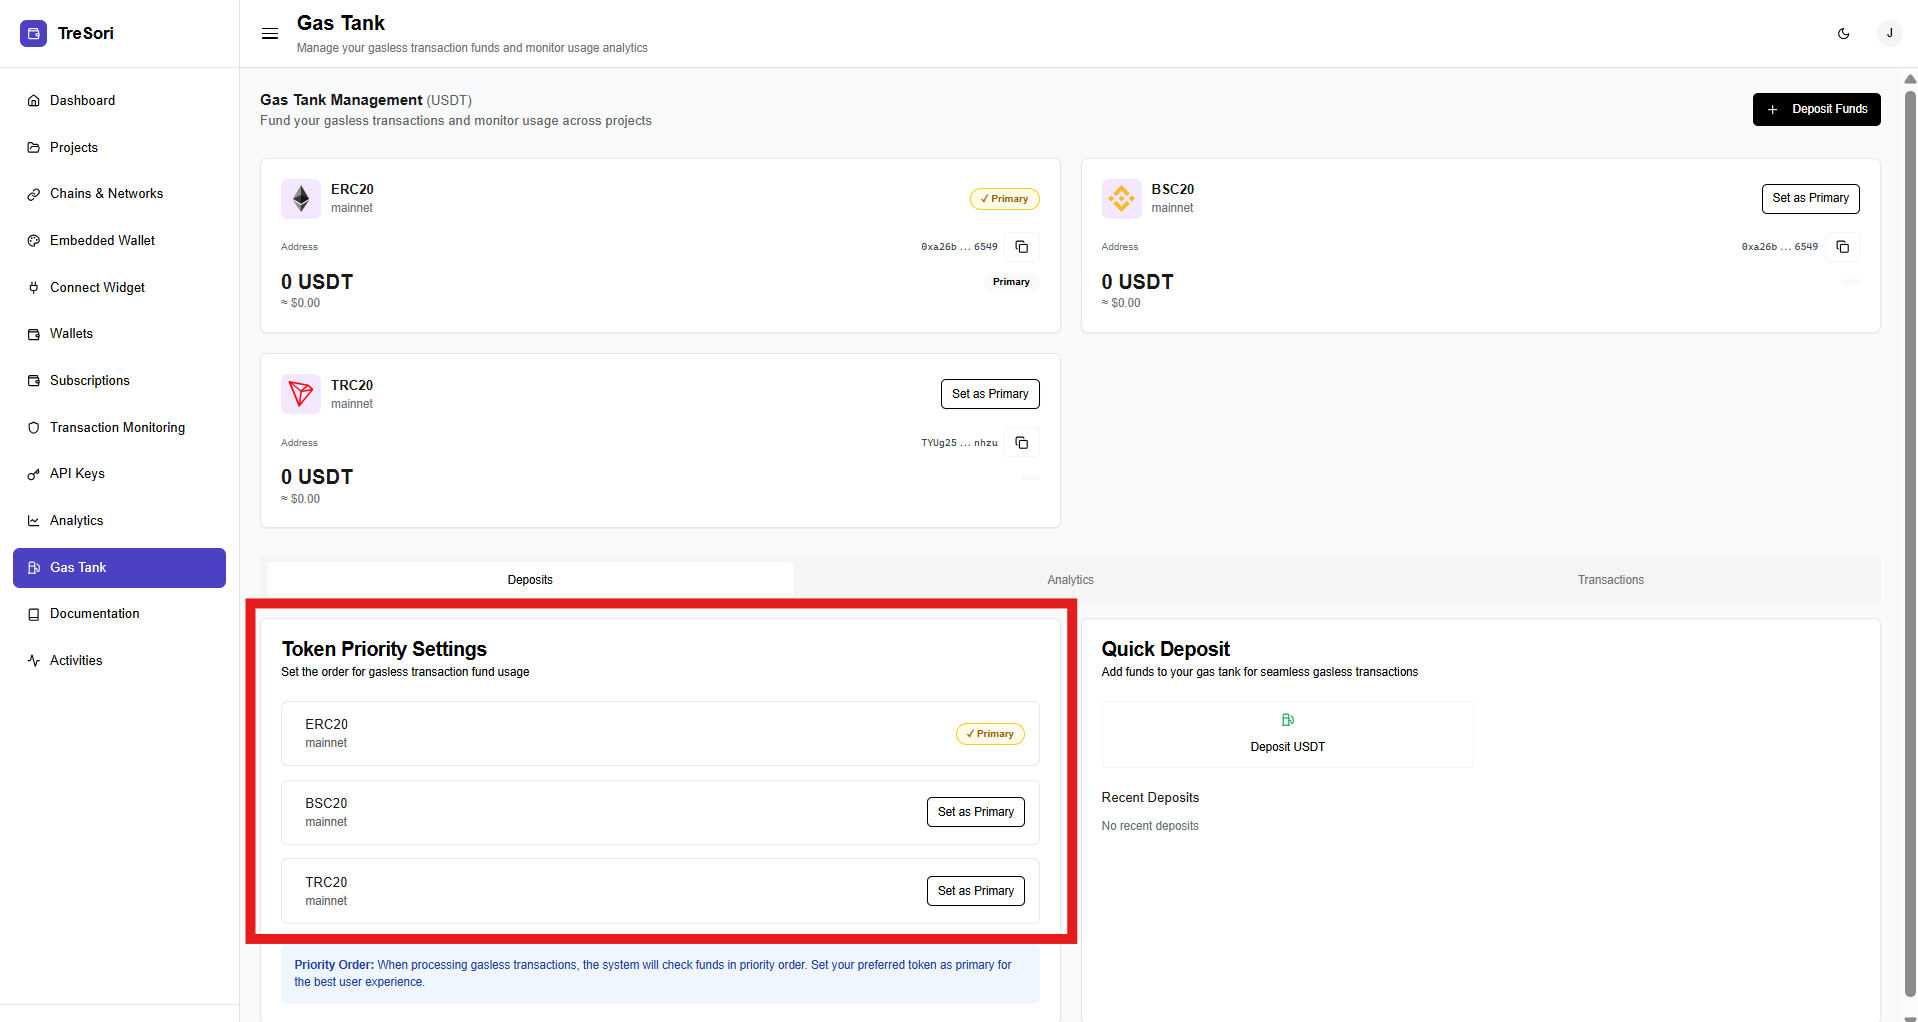
The **Token Priority Settings** section allows users to define the **order in which gas balances are consumed**.
**How Priority Works**
* Networks are checked sequentially based on priority order.
* Users can set any supported network as **Primary**.
* Priority ensures optimal reliability and cost control.
A clear informational note explains that priority directly affects how gasless transactions are processed.
### Depositing Funds
Depositing funds into the **Gas Tank** ensures that gasless transactions continue to function smoothly by maintaining an adequate USDT balance. TreSori provides both a **Quick Deposit** option and a **Deposit Funds** action to make funding simple, transparent, and flexible.
TreSori provides two ways to deposite fund.
1. By clicking on the **"Deposit Funds"** button (top-right), provides a direct action to add gas funds to the system.
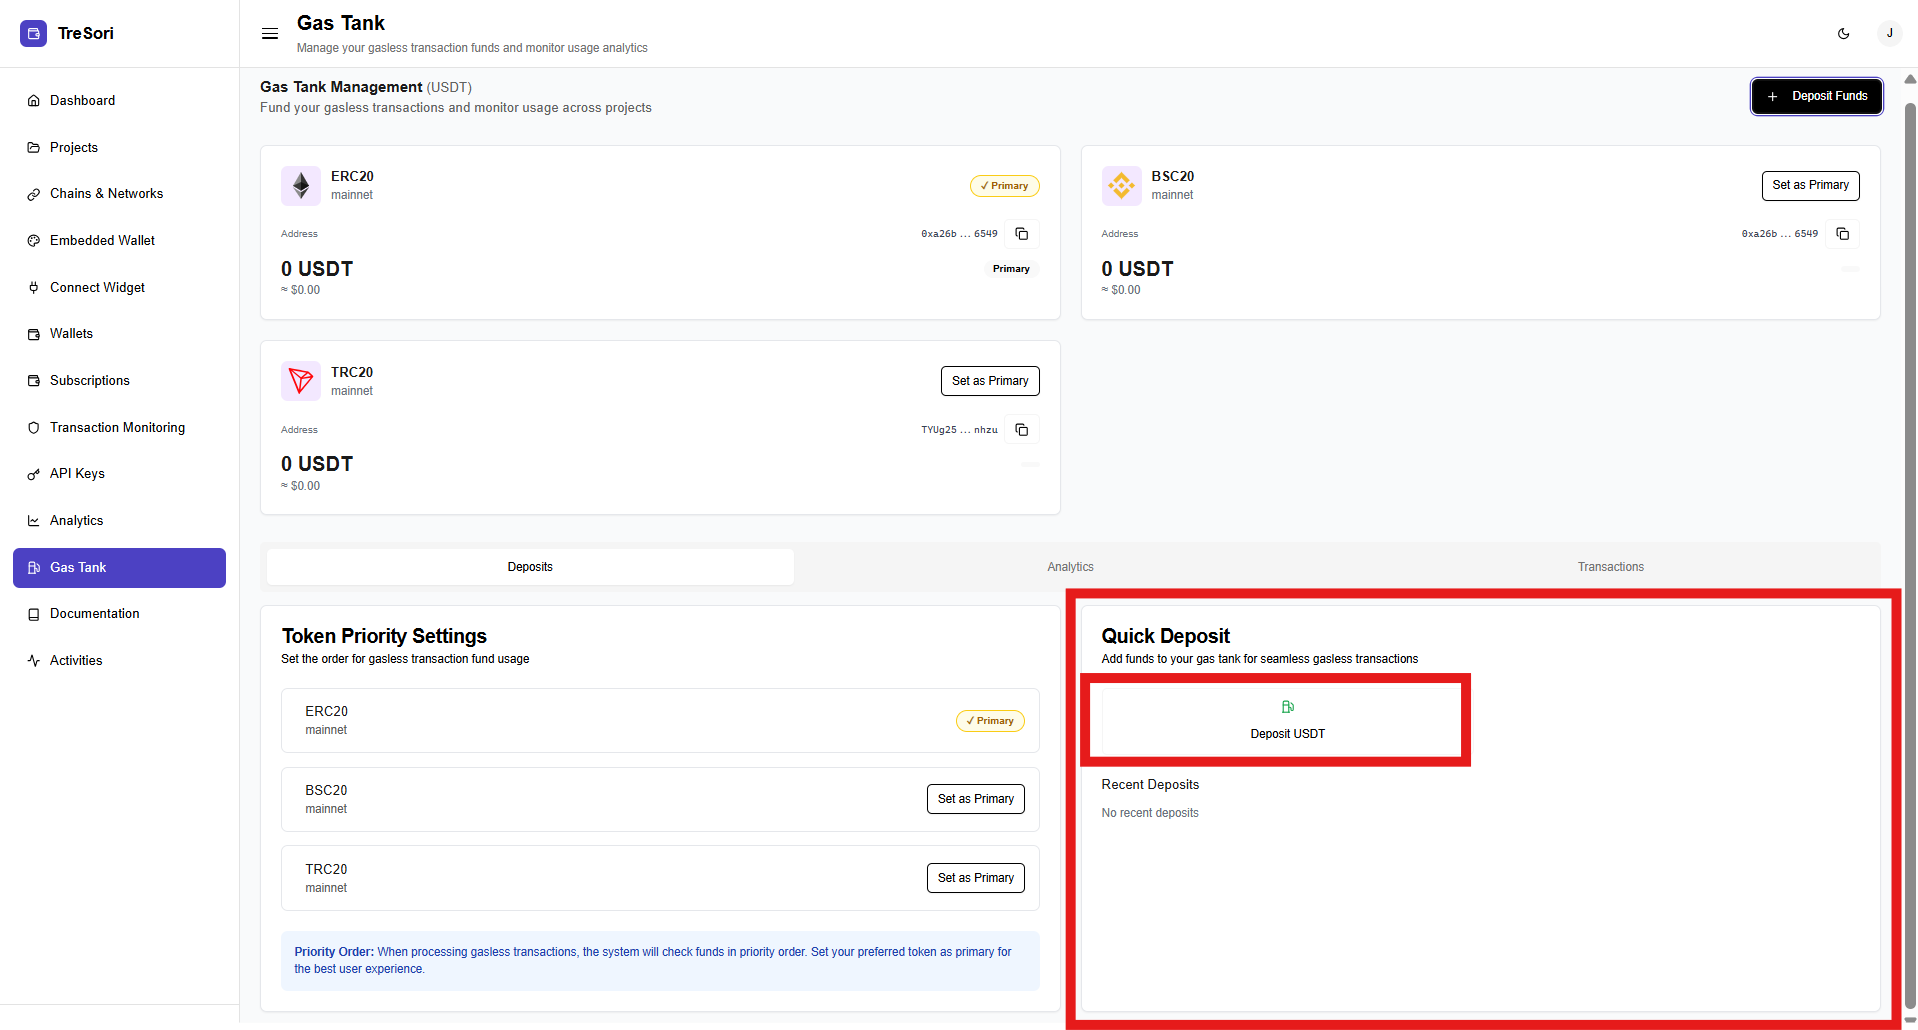
2. **Quick Deposit**
The **Quick Deposit** panel is designed for fast and convenient funding of the Gas Tank. It displays the wallet address for the selected network where users can deposit **USDT** directly. Once the transfer is completed on-chain, the deposited amount is automatically credited to the Gas Tank balance for that specific network.
For transparency and tracking, the Quick Deposit panel also displays **recent deposits**, allowing users to verify successful transfers and maintain visibility into their funding activity.
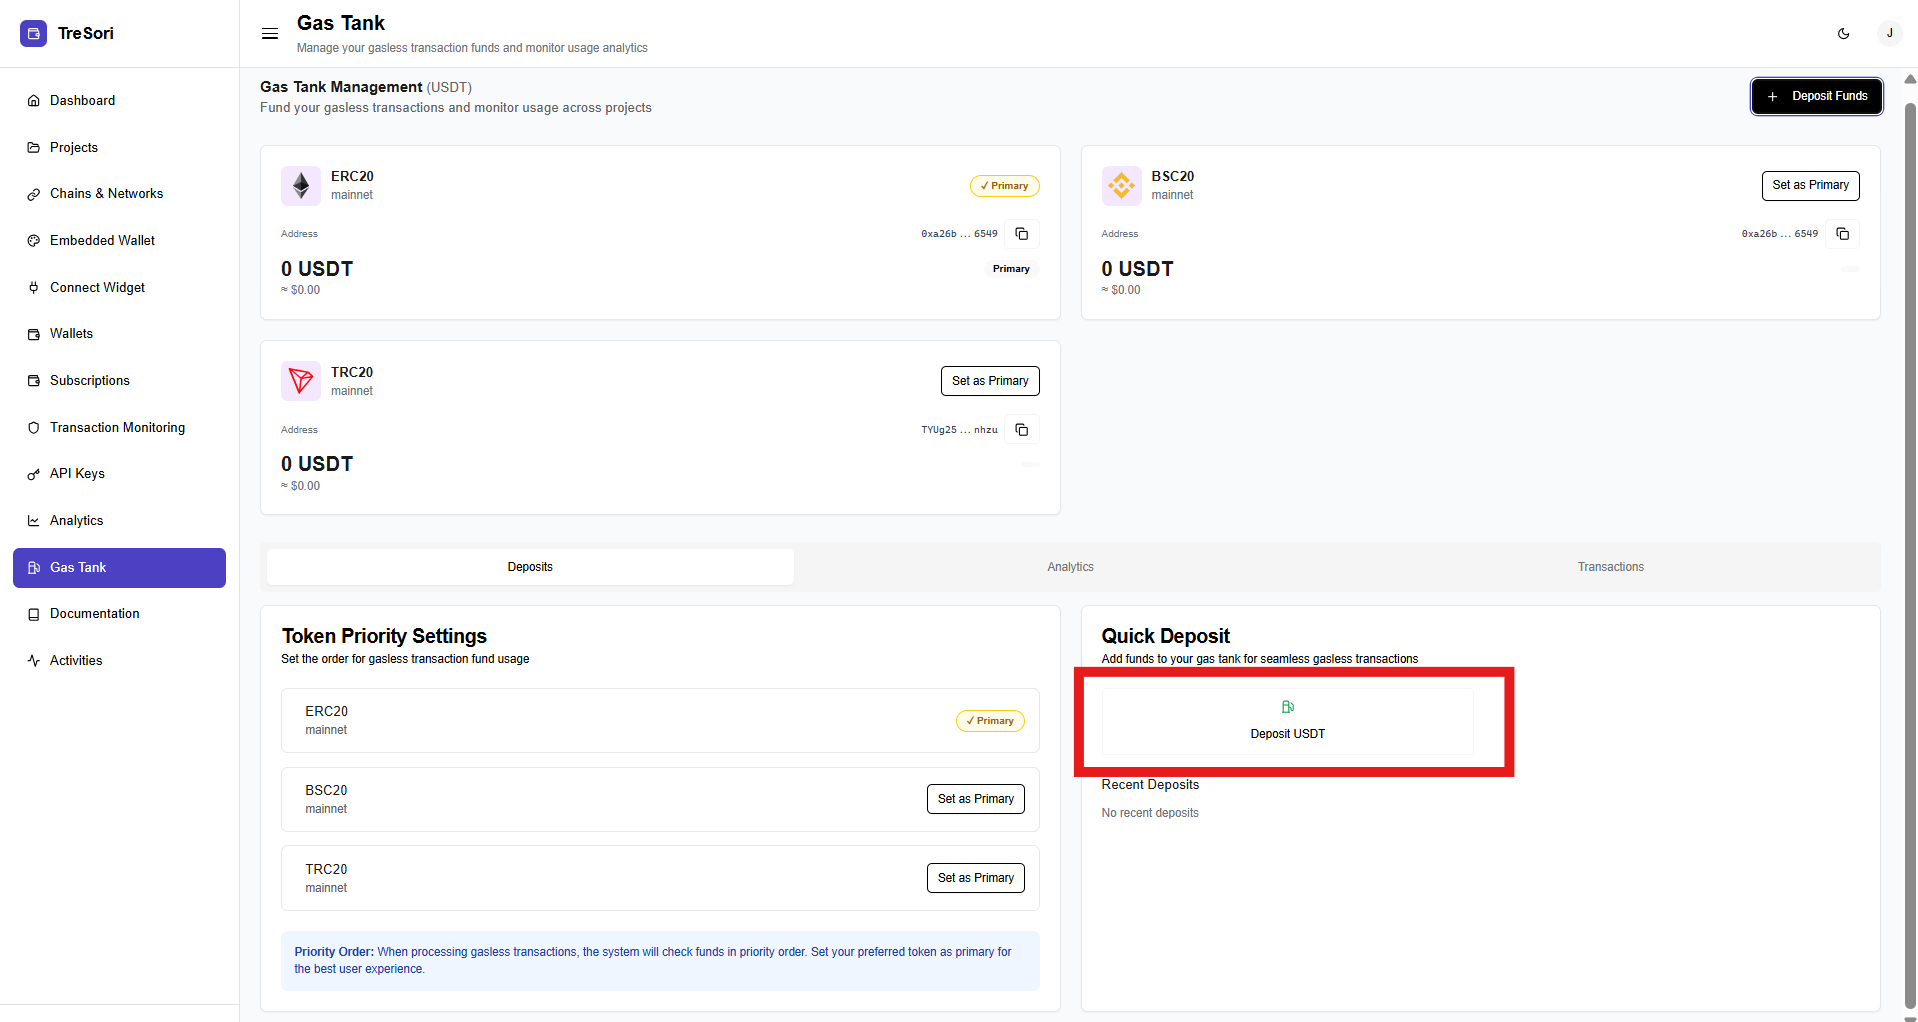
How to perform Quick Deposit
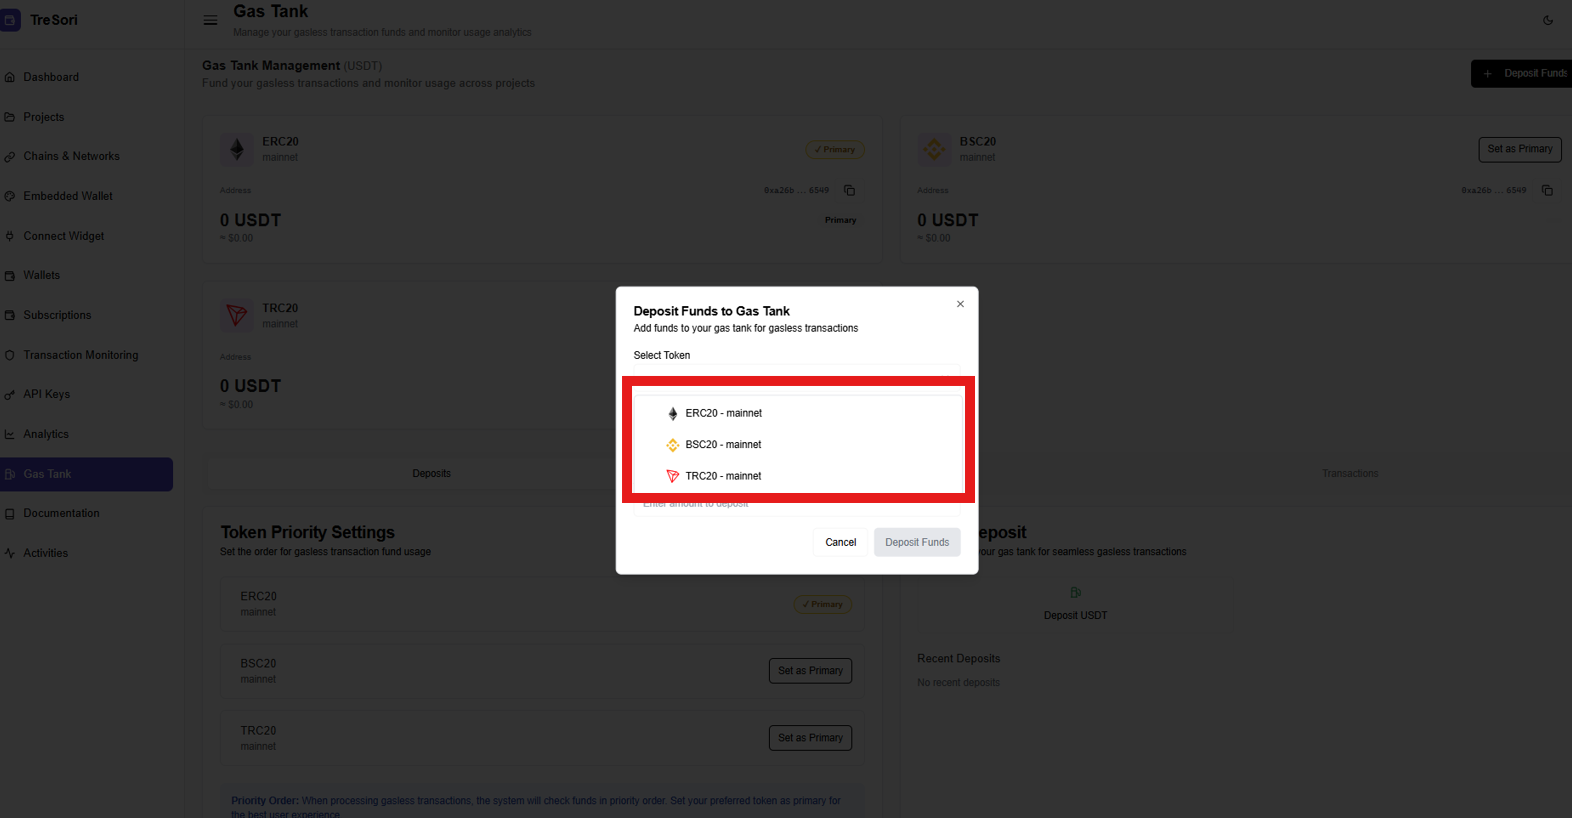
**Step-1:** Click on the "Deposit USDT" button.
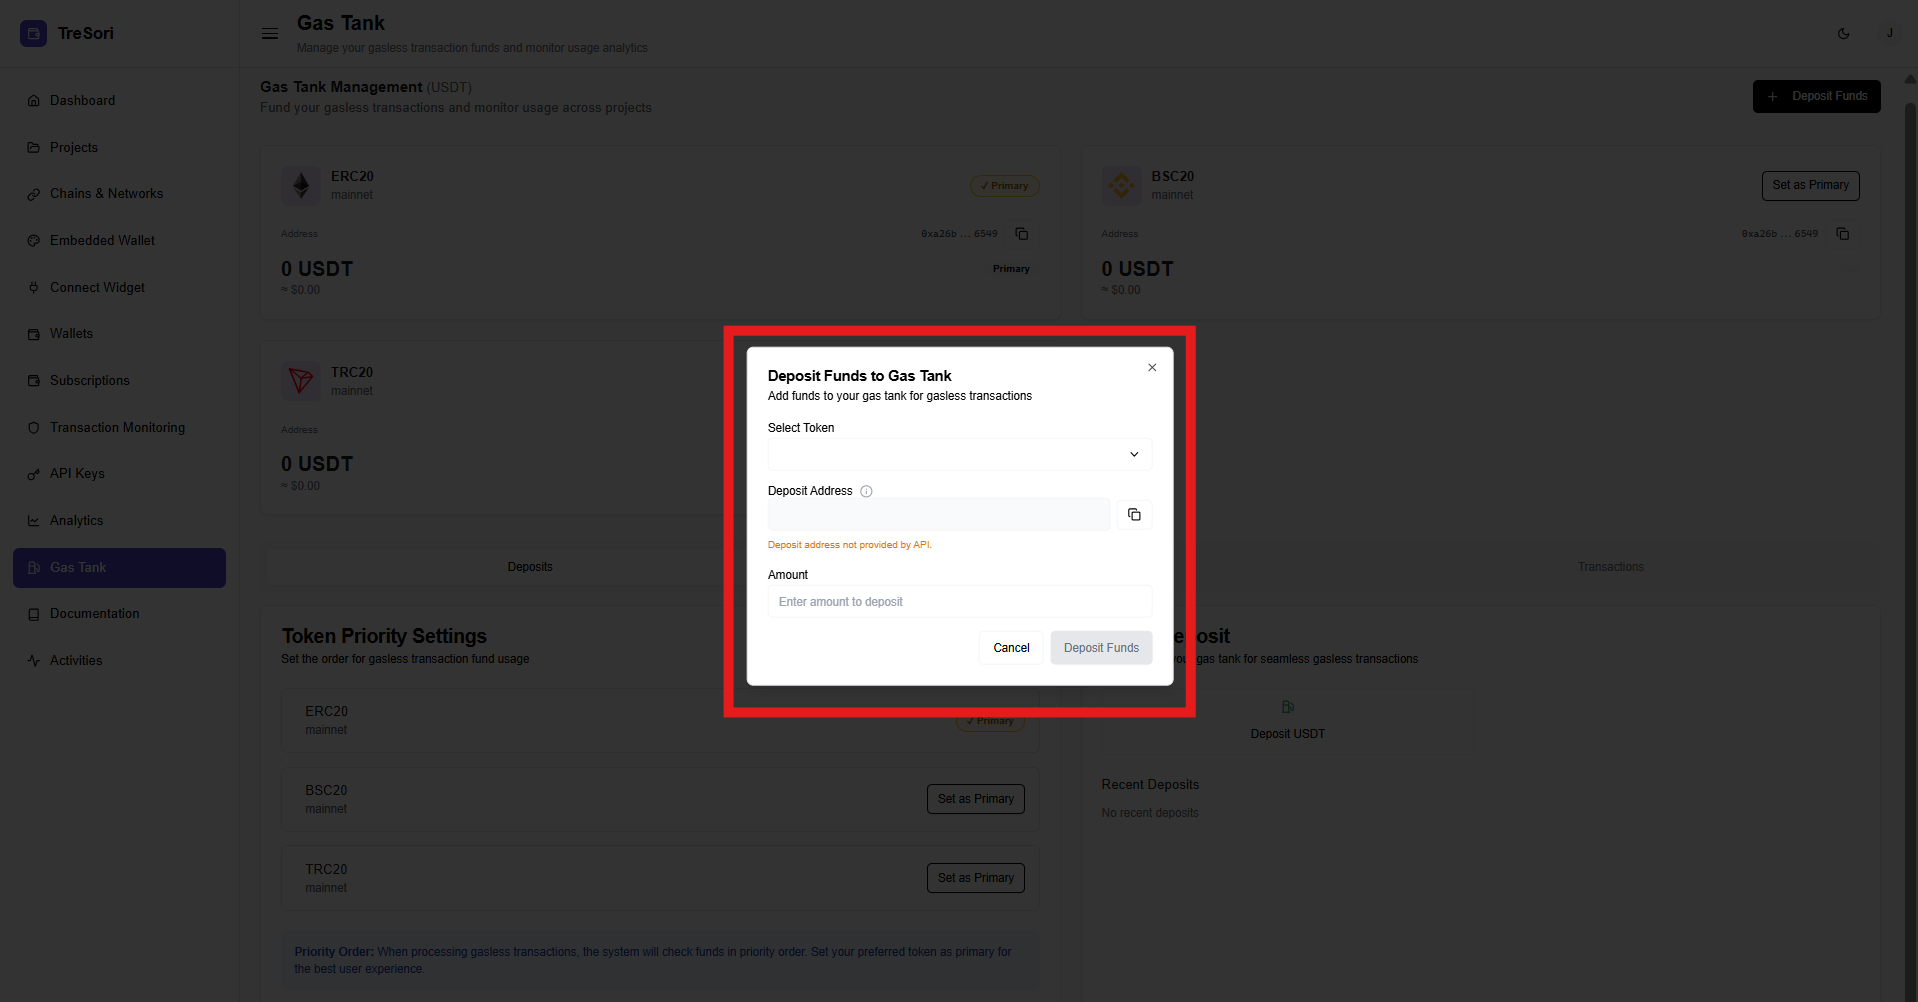
As soon as the user clicks on the tab, a panel is displayed that allows them to perform a quick deposit, as shown in the image below.
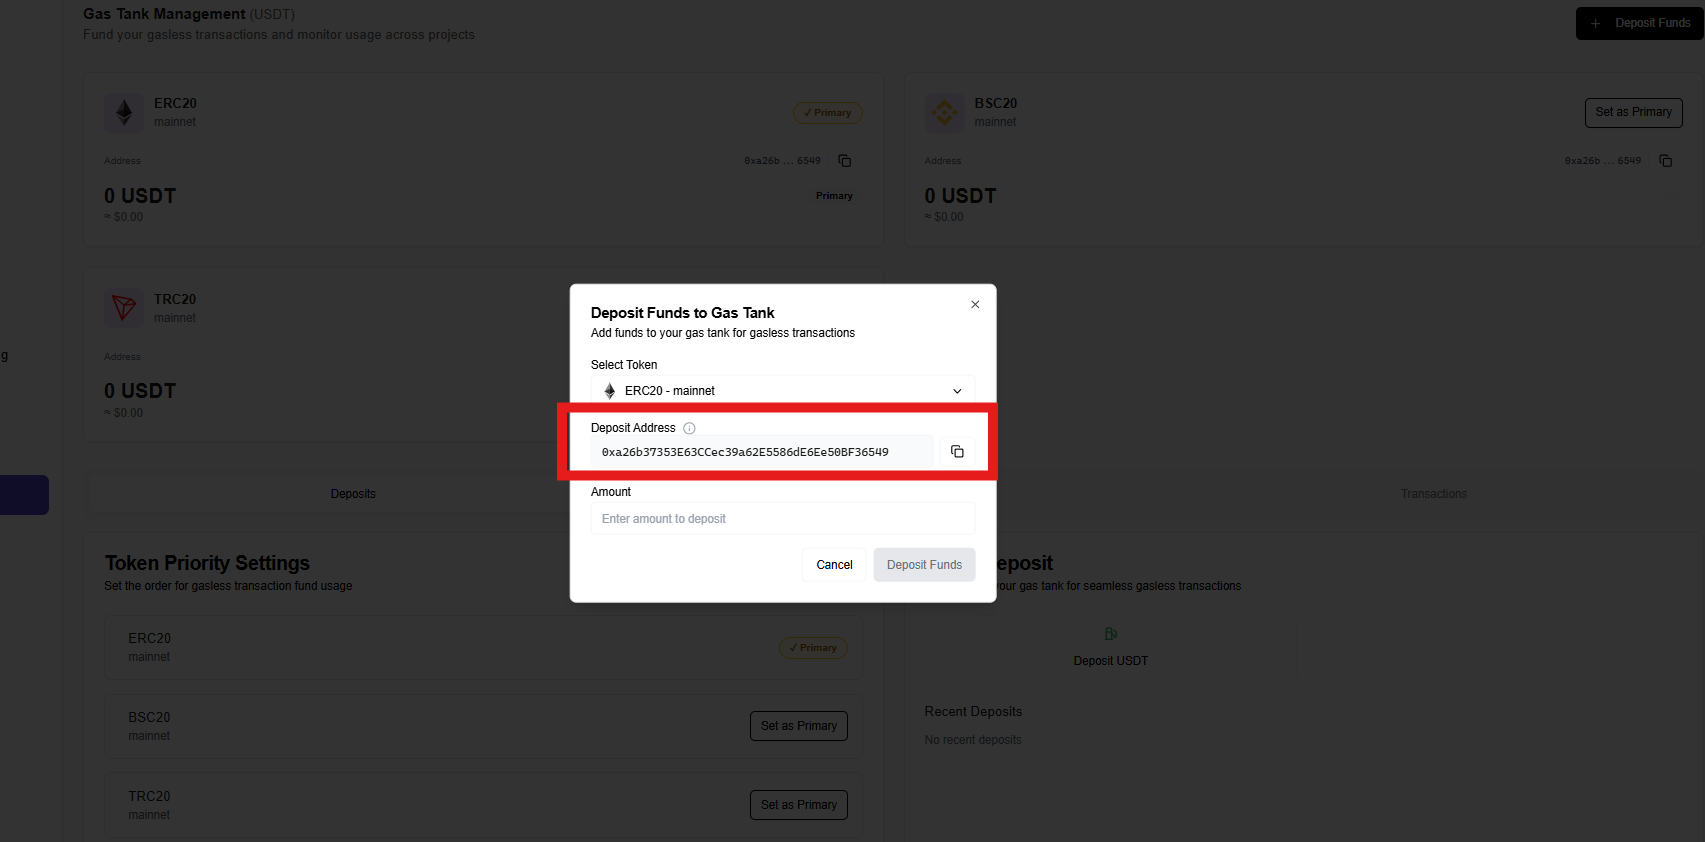
**Step-2:** User need to select the Token Network for which they want to do a quick deposite
Once the network is selected the associated Wallet address will be displayed
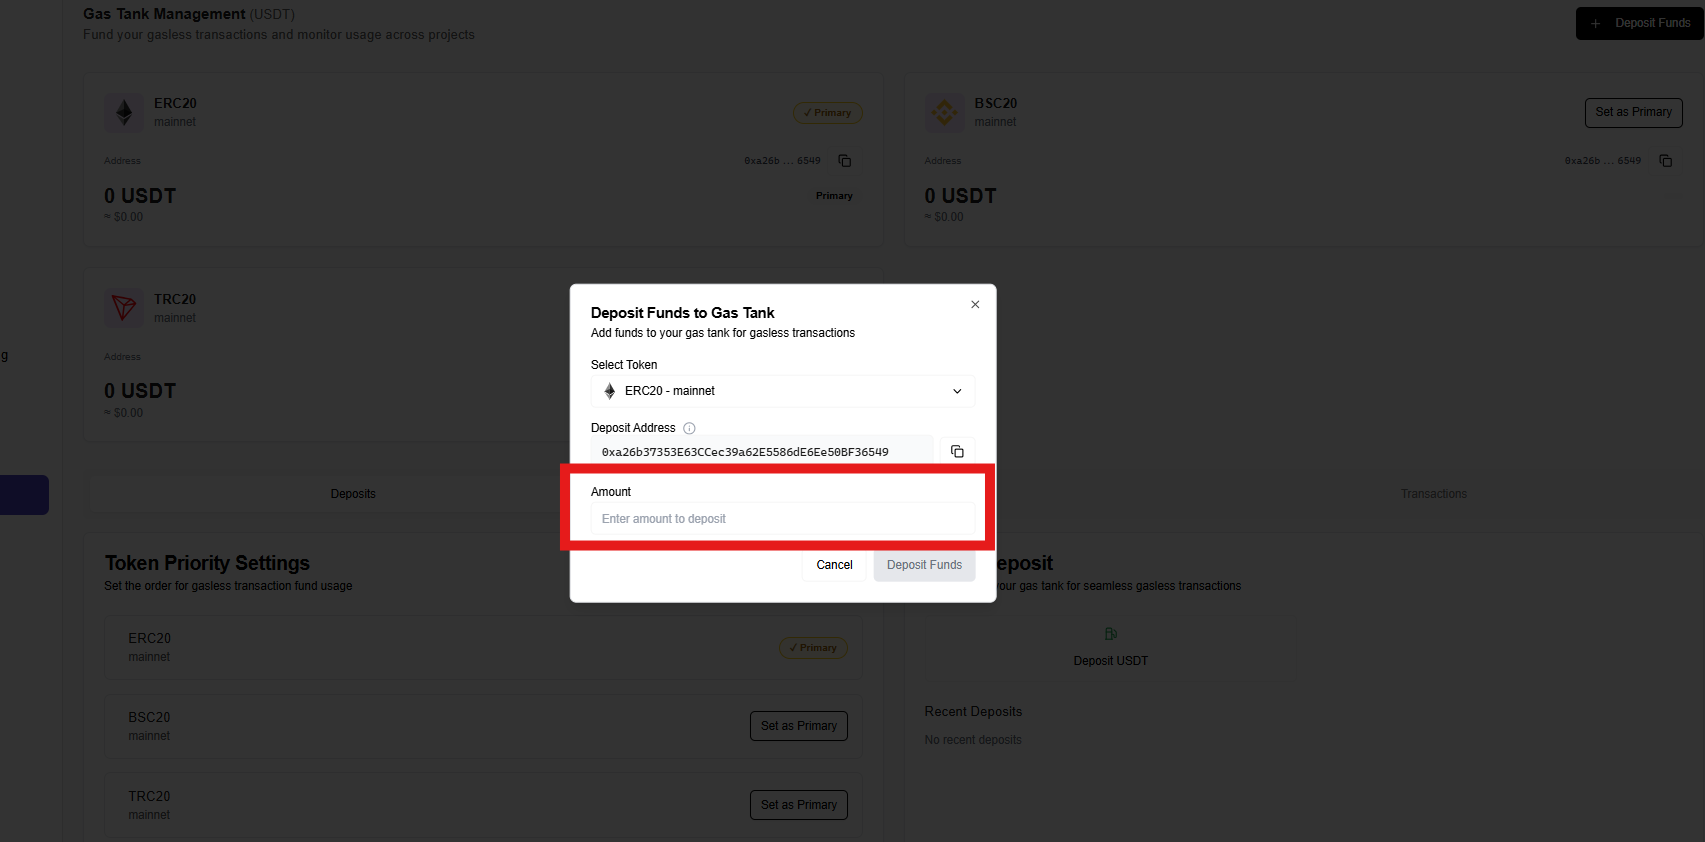
**Step-3:** Enter the amount
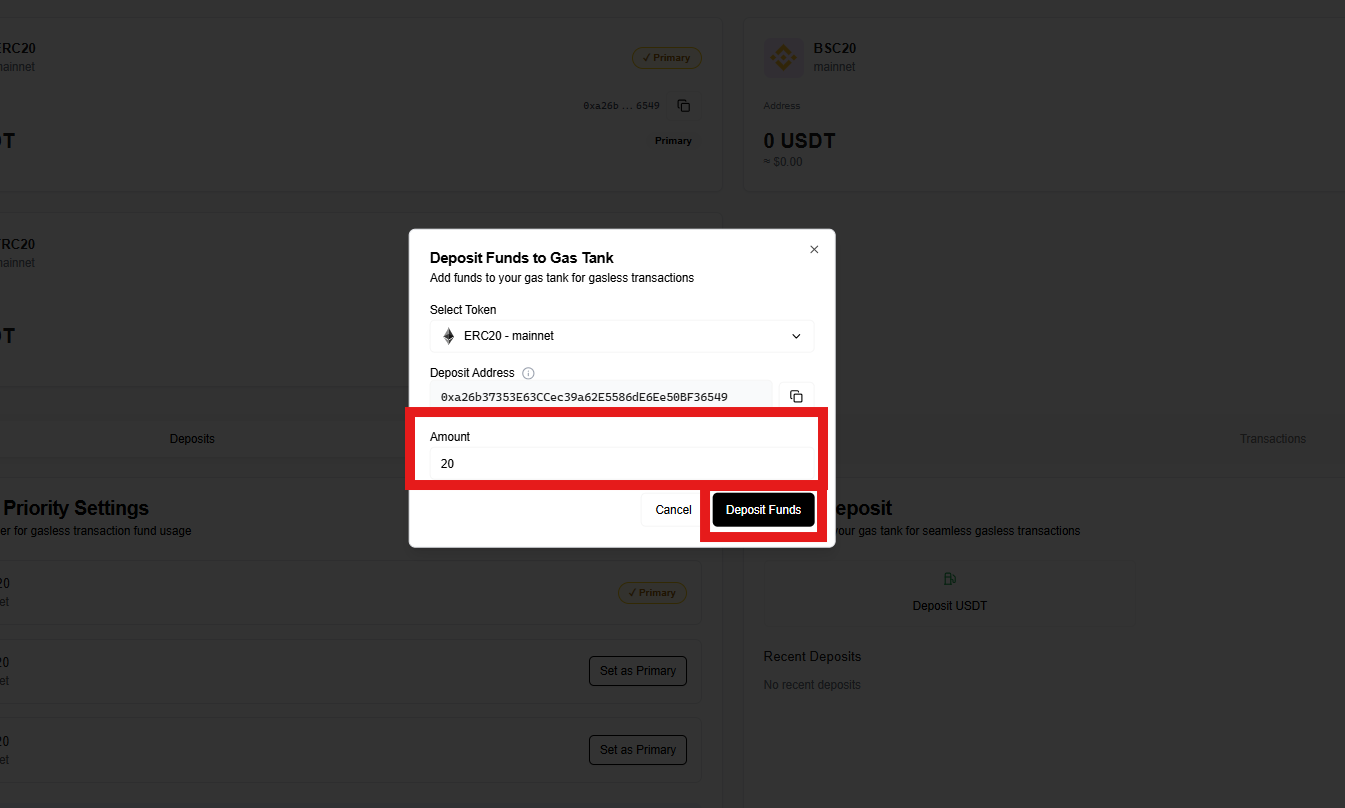
Once an amount is feeded the "Deposit Fund" button will be enabled.
**Step-4:** Click on "Deposit Fund" for the final step.
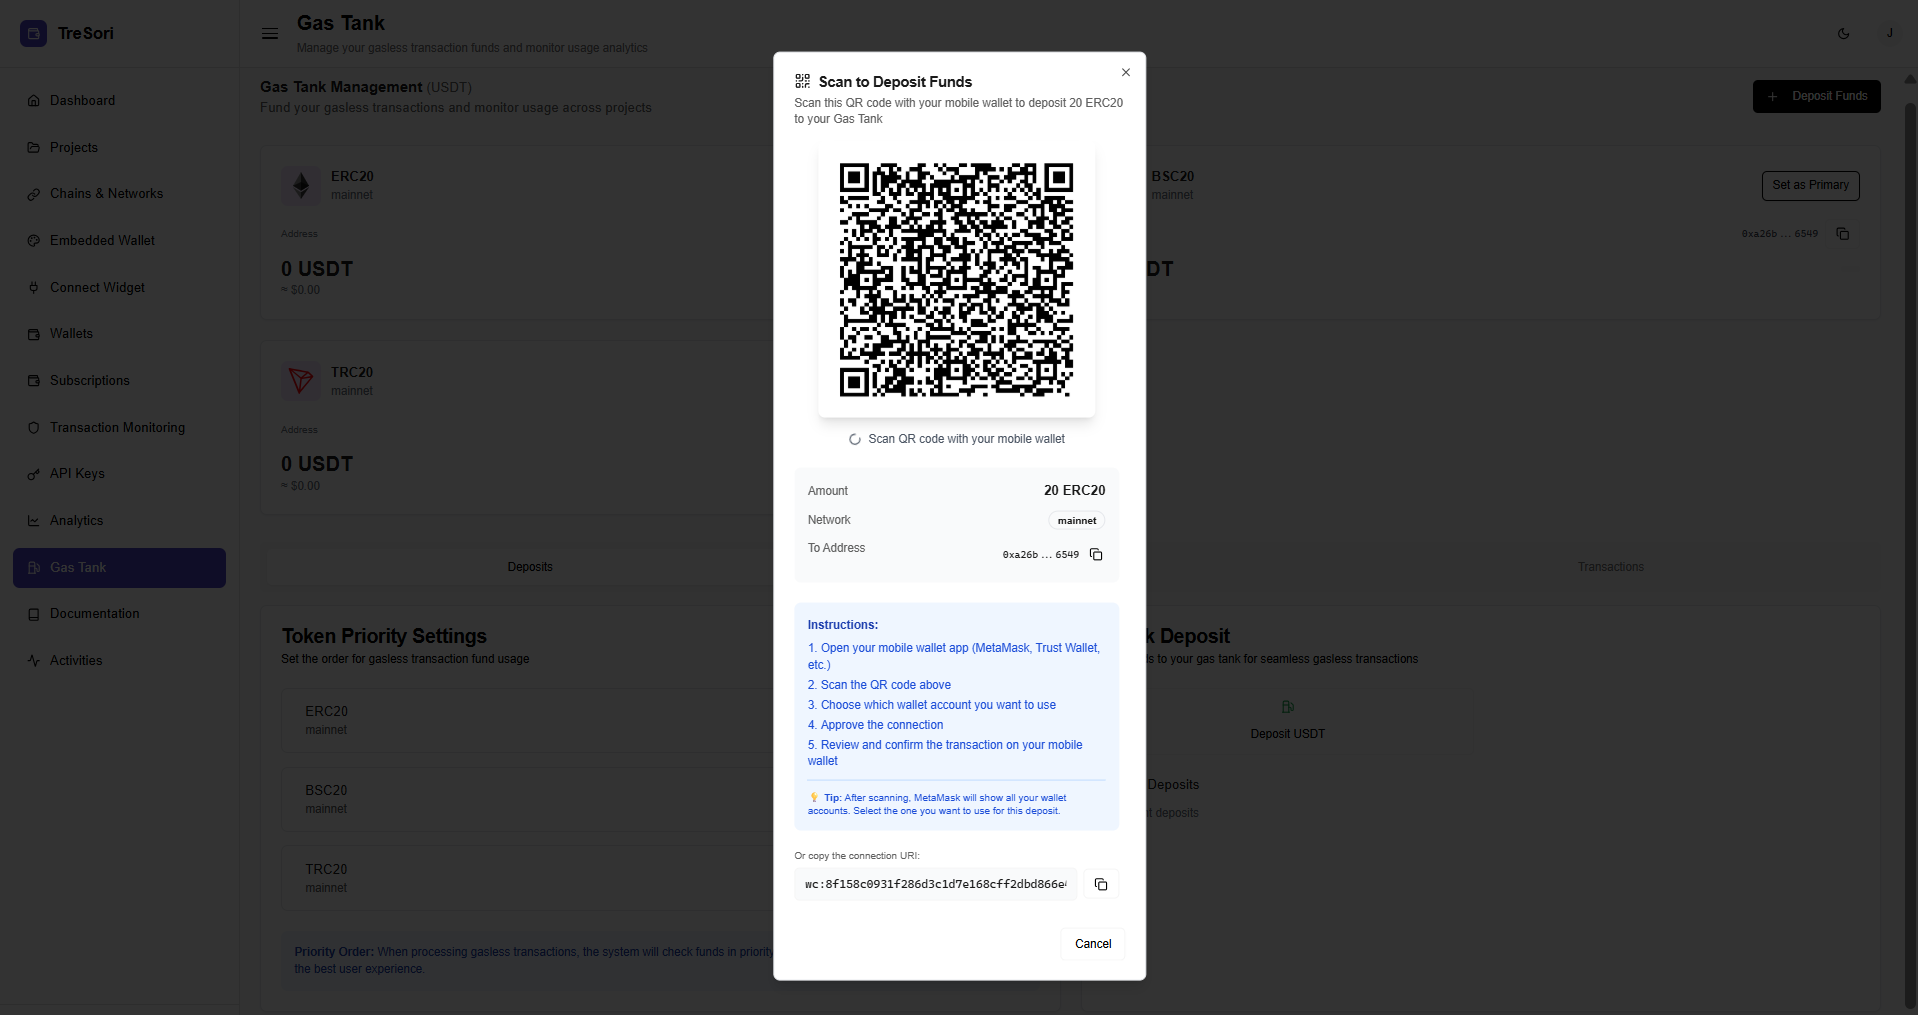
Once the user submits all required information, a QR code for fund deposit is displayed on the screen. The user can then scan the QR code using their mobile wallet application to deposit the required amount.
#### Analytics